Posters and Charts

This gallery contains 3 photos.

Quality posters in a classroom are often an expense that can be significant to many, but if you have any artistic skills at all you can use flip charts to add a little professionalism and pizzaz to your class.  Let’s look … Continue reading

More Galleries | Leave a comment

Can You Eat a Pop-Up

misc_jumpWell, you can if you are in the north-east, but here we are talking about a different kind of pop-up.  As stated in previous posts, using pop-ups in your training provides a way to break up content, get people on their feet, and engage the kinesthetic learner. In general they require minimal preparation and can be used when the dreaded “glaze” falls over a participant’s eyes.

Here are a few “Pop-Ups” that you may choose to use during a section of training, especially content being delivered by lecture:

#1 – Have colored index cards on the table in mass quantities. After a 10-15 minutes section of training have everyone take a card and write a question related to the recent content on that card. Then, on the count of three, have everyone “pop-up” out of their chair, go to someone at another table, and have them ask each other their questions.

#2 – After a section of training say, “The last person to pop-up out of their chair at your table has to tell everyone how they will use what they have learned in the last 15 minutes.”

#3 – After a section of training have everyone “pop-up” and find someone in the room that they have not interacted with before. Have them share with each other one thing they think is most important concerning what they have learned in the last 1-15 minutes.

Have any other pop-up ideas.  Send them to poortrainer@gmail.com


Posted in Training | Leave a comment

Stories and Tales in Training


imagesAfter hearing my “Mole” analogy in a training on change management (I’m from East Texas and grew up on a farm), a friend asked if I would consider writing out some of my stories.  Unfortunately, I have neither the time nor the desire to do so.  However, I thought I would write a quick post on stories in training and teaching.

Few teaching tools have the impact of a good story and facilitators should always be looking for new stories to illustrate a point.  I have found that the more stories and analogies I read, the more likely I am to see an analogy from my life that I might use in training.  However, here are some of my favorite resources for stories:

  • Reader’s Digest
  • Chicken Soup for the (you name it) Soul
  • Every Day Greatness
  • Anything from John Maxwell, his books have numerous illustrations
  • Fresh Illustrations for Preaching and Teaching

The internet also has a ton of illustrations for different topics.  A couple of points:

  1. Use short illustrations
  2. Make sure they are relevant to the topic
  3. Use humor when you can; a funny story is remembered longer than a boring one
  4. Use emotion when you can; an emotional story is remembered longer than a funny one

Being a life-long reader not only gives you a better perspective to teach from, it also gives you a lot of resources to teach with.  One of the most important tools you can use are short,  humorous or emotional stories to make a point.

Got a good illustration, send it to poortrainer@gmail.com

Happy training.


Posted in Training | Tagged , , , , | Leave a comment

Mixers, Openers and Pop-Ups

OLYMPUS DIGITAL CAMERAA lot goes into facilitating a good training and one of the key skills of a good trainer is knowing when to “call and audible” and insert an activity into a curriculum.  Having a variety of Mixers, Openers, Closers and Pop-Ups allow you to make adjustments on-the-fly  when you are running short of content, need a quick review, or when you  have a class that seems to have succumbed to the high carb lunch they consumed.  In this post I will explore the differences between the activities and in subsequent posts will provide some examples of some activities you may use.  Let’s start with a common understanding of terms:

Mixers – Mixers are activities that allow participants to relax, disconnect from their day-to-day activities, and network among other participants.  These activities can last from a few minutes to half an hour depending on class size and time allowed.

Openers – Openers are much like mixers though you should always try to relate the activity to the content of the class.  Bob Pike says the key to an Opener is that they:

  • Break Preoccupation – Help the participant disconnect from their day-to-day responsibilities.
  • Allows for Networking – Helps participants get to know who is in the room
  • Is Related to the Content – The key difference between a mixer and an opener is that an opener is related to the content of the class.  In many cases you can accomplish this by saying “how does this activity relate to the topic of ???”
  • Is Fun for the Participant
  • Is Fun for the Instructor
  • Leaves them Wanting More – Peaks their curiosity so they are ready to learn more about the topic of the class.

Pop-Ups – Brief activities that break up content and require participants to re-engage with the class.  The attention span of the average adult is 10 – 12 minutes so adding activities to content is needed to maintain focus and attention.

 Closers – Use a closer at the end of a section of training.  Closers have the following attributes:

  • It should help create an action plan. What will the participant do with the information obtained and how will they use it in the next 30, 60 and/or 90 days.
  • It should be a celebration – Make the closer of training a celebratory experience. They have invested their important time to learn skills and information that will be valuable. This is worth celebrating.
  • It should tie everything up – The activity should create an opportunity to review content, plan for action, and even remind them of something forgotten when the activity is shared with their small group or with the class (which should almost always be the case).

In my last post we explored a window-pane activity that could be used as a closer.  Let’s take a look at an activity you may choose to use as an opener for training.

You will need a few supplies.  Ensure that the tables have standard 8×11 card stock and markers.  Sharp tip markers are helpful if available.

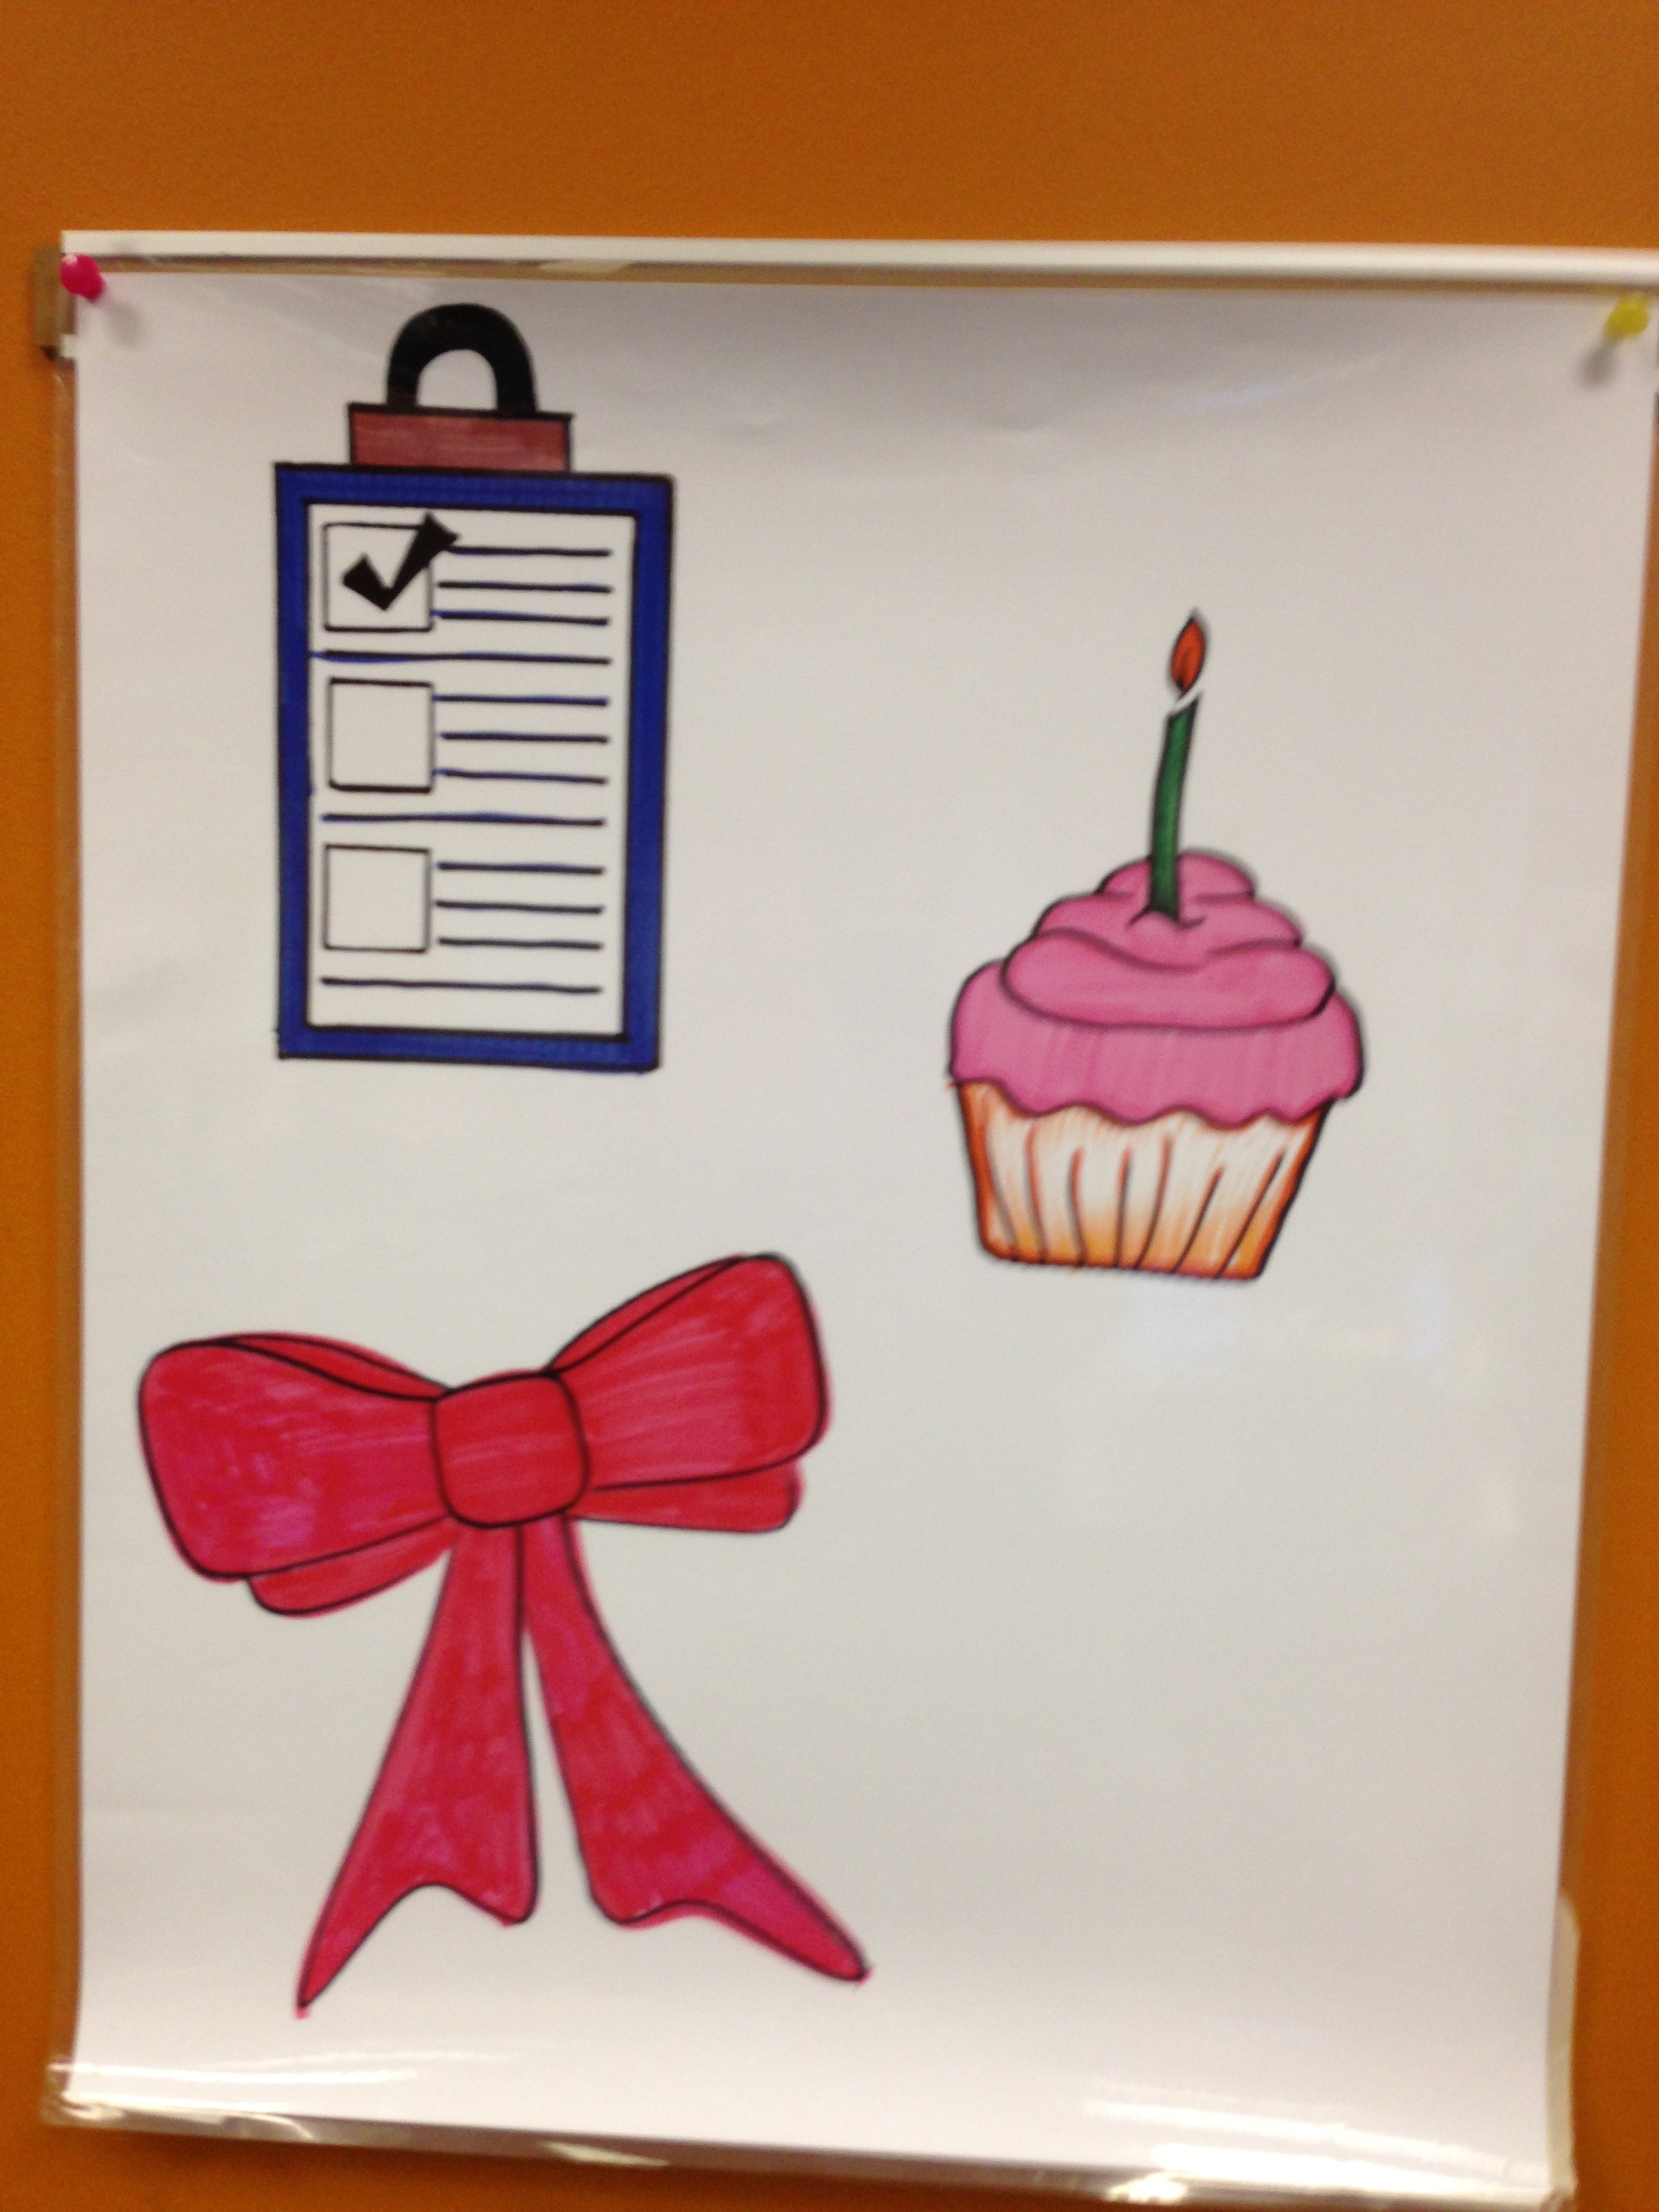
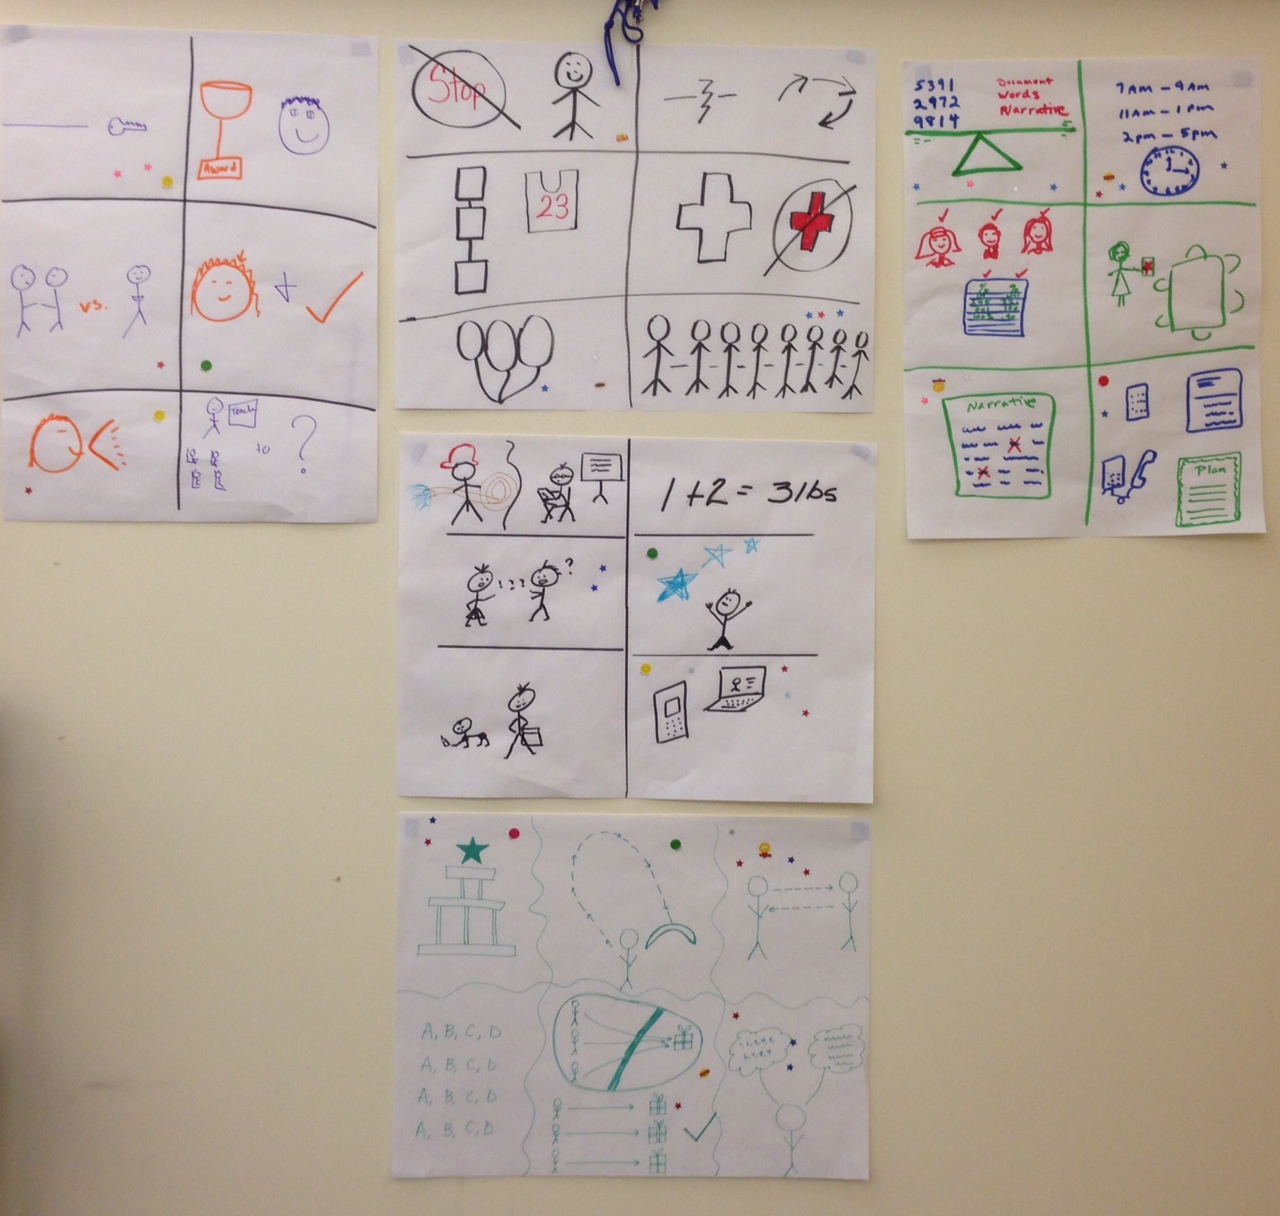
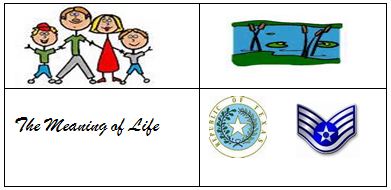
Have participants turn over their name tent (which will often be 8×11 card stock) and divide the page into four equal sections.

  • In the upper left have them draw something that represents something personal about them (family, favorite vacation, etc.).
  • In the upper right have them draw something that represents where they live or where they are from.
  • In the bottom right have then draw something that represents their work history.
  • In the bottom left have them write out one thing they would like to learn from the training. The back of their name tent might look something like this:

Name Tent


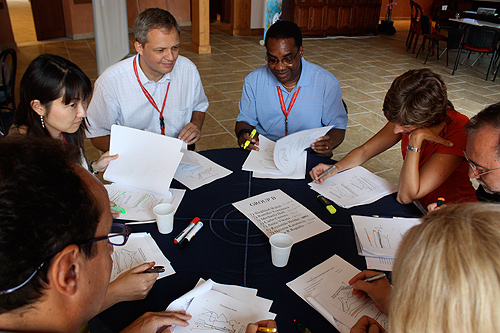
After they complete their drawing they will:

  1. Find someone in the room they don’t know well and see if they can guess each other’s drawings.
  2. When you ring a bell or sound a whistle they then switch and find someone else and do the same thing once more.
  3. Change once more if you have time.

At the end of the activity have everyone “high-five” their current partner and return to their seat.

As you can see, this meets the definition of a opener.  It breaks preoccupation, the exchange of information allows for networking, answering what they would like to learn from the course relates it to the material, it’s fun for everyone and will hopefully leave them wanting more.

Got any other ideas for openers, send them to me at poortrainer@gmail.com

Next week I will post my 2-3 favorite pop-ups that can be used in almost any class.  Happy training!!!

Posted in Training | Tagged , , , , , , | Leave a comment

Window Panes

I recently had the opportunity to attend a train the trainer for curriculum designers.  One of the things I walked away with was the need for a closer for each section of training.  It is one of the most overlooked and ignored portions of the training as we often run out of time and end the training saying something like; “Well, that’s all the time we have today, thank you for coming out.”

However, the closer is one of the most important parts of a training as it reinforces content and can create an opportunity to review how people received, and retained, the training.  According to Bob Pike, there are three elements that should be present in every closer.  They are as follows:

IMG_0333

  1. It should help create an action plan.  What will the participant do with the information obtained and how will they use it in the next 30, 60 and/or 90 days.
  2. It should be a celebration – Make the closer of training a celebratory experience.  They have invested their important time to learn skills and information that will be valuable.  This is worth celebrating.
  3. It should tie everything up – The activity should create an opportunity to review content, plan for action, and even remind them of something forgotten when the activity is shared with their small group or with the class (which should almost always be the case).

One of my favorite closers for a full training is having the participants create window panes.  This requires the participants to review the course content, choose the 4-6 most important things they learned, and then create a graphic representation of those items.

Considerations:

  • Use flip chart paper and have them draw six concepts they have learned so far.  Use bond paper and have them draw four concepts for a one to two-day training.
  • Provide markers and crayons.
  • Assure participants they do not have to be artist, all they have to do is do their best.

Window Panes

As you can see from the graphic at the left, we used window panes on flip-chart paper to review concepts from a week-long training.  As they each reviewed what they thought was most important we had a good laugh (with each other, not at each other) and everyone was re-exposed to the content from the week.  In fact, almost every objective in the training is represented on this wall.  The activity was fun, interactive and was a great way to wrap up the week on a positive note.  Though there were a number of groans when I gave the instructions at the start of the activity, everyone was laughing and learning at the end.  People shared what they learned that was most important, what they planned on doing with the information, and was encouraged by everyone else in the class.  Further, I was able as the instructor and curriculum writer to make sure the content was being absorbed.  There is no better way to wrap up a class then to meet all the objectives of a closer.

Remember, you should have an opener and a closer for each unit of training as well.  This is one that is good for closing an overall training.  We will review briefer closers that can be used throughout training in another post.

Do you have any ideas for a closer.  Post them below for others to see.

Happy training all.

Posted in Training | Tagged , , , | Leave a comment

A Better Use for Power Point

Participants make a determination concerning your professionalism and credibility within seconds of entering the training room. How the room is set up, what you are wearing, how you greet them and the overall environment set the stage for a successful 3 hour, or three-week training. There are a number of ways you can create a professional environment.  One of my favorite is Power Point.

I like Power Point. I have to say I am loosing interest in using Power Point with every unit of training, but I do like it as a way to “dress up” a presentation or set the stage for a class. One of my favorite ways to use Power Point is to pique interest in the class before the class gets started or to give participants something to watch or think about while waiting for class. There are a couple of ways you can accomplish this:

  • If you use a Power Point  in class, randomly select some of the slides and have them running before the class begins.  This does not work well with slides full of text, but works great if you have pictures with just a few words that help cover content.
  • Use a Power Point with pictures and have them running with music as participants arrive.  Diverse pictures of people work well with Cultural Diversity Trainings, pictures of heavy equipment might work well for a safety training, pictures of nature might work well with a presentation concerning recycling.  You get the idea.
  • Finally, I love quotes and often have a slide show of 90+ quotes on a variety of topics running before class.  I like to use humorous quotes as it sets the stage for an interesting and interactive class.  However, you can always select topics relevent to the class being facilitated if you want to focus interest before the training begins.  It takes a little time to enter quotes on Power Point but you can use this 15_minues_of_quotes Power Point to get started.  It is completely editable and can be added to or modified as you need.

Have any additional resources for making a good first impression.  That’s right, you need to e-mail me at poortrainer@gmail.com

Posted in Training, Uncategorized | Tagged , , , | Leave a comment

Choosing the Leader

Group Work in the Classroom Types of Small GroupsPlease don’t call on me. It’s what they’re thinking.  At least some of your participants are scared to death that you will ask a questions and turn a wary eye their way, point them out, and demand an answer. One of the cardinal rules in my classes is never call on anyone to answer or pray.

I like small groups for a number of reasons. Give a small group a question and you will see the person who always jumps up with the answer…jump up with an answer. But then you will see something else. The shy, quite young lady with a spark in her eye will quietly add something critical. The borderline burnout with questionable social skills may add his two cents worth. Given time, everyone in the group will add to the answer or solution. So who gets to report back to the larger group how the discussion went.

What I usually do is break the class into small teams (4-6 people) and then use one of the following statements to choose a team leader:

  1. Once you have your answer, the person with the newest shoes gets to report back to the class.
  2. Once you have your answer, the person with the most recent birthday gets to report back to the class.
  3. Once you have your answer,the person who has been with the agency the longest gets to report back to the class.
  4. Once you have your answer, the person with the most pets at home gets to report back to the class.
  5. Once you have your answer, the person with the most keys on their person (yes a purse counts) gets to report back to the class.
  6. Once you have your answer, the person who most recently bought pants gets to report back to the class.
  7. Once you have your answer, the person who drives the oldest model car gets to report back to the class.
  8. Once you have your answer, the person who most recently saw a movie at a movie theater gets to report back to the class.
  9. Once you have your answer, the person who most recently went on vacation gets to report back to the class.
  10. Once you have your answer, the person who most recently went on a date gets to report back to the class.

A couple of considerations…

  • When you choose the people with the newest model cars and the newest shoes back to back, you may get the same person.  Considerations should be given as to which of these will result in the same person being chosen based on financial status, age, etc.  Use a variety of these options to ensure a variety of people are given the status of group leader throughout the training.
  • Sometimes you can choose a group leader and then have the group leader choose who presents back.  One exercise I use is to have everyone at the table point their index finger in the air.  Then, when I say “1, 2, 3 GO,” they then have to point to who they would like to be the group leader.  Once everyone points and the votes are tallied, you can then say, “OK, the group leader can choose who reports back.”  This adds a little humor to the event and the group leader can choose to report back themselves if they like.

Groups are a great way to include input from the participant who won’t say a word as well as the participant who won’t shut up.  Creatively choosing the group leader can add a little fun and excitement to the session while allowing participants to network and learn more about one another in a non-threatening way.

Any other ideas on how to choose a group leader?  Feel free to respond here or email me at poor trainer@gmail.com

Posted in Uncategorized | Tagged , , , , , | Leave a comment

Breaking Into Groups

focusgroupGroupies

When it is time to break participant’s into groups how can you make the process smooth and effective.  Here are a few things to consider…

  • If you’re looking for simplicity, there is nothing easier than numbering off.  To make it a little more creative, number off backwards or try doing it in another language.  From Training for Dummies
  • If you find yourself needing to choose who will be in which group, use different colored stars (or other stickers), a different color for each group.  At lunch, or after the days’ class, put the stars on their name tent making sure you put the people together you want.  It is a great way to separate the click that is making your life a living hades.  When the class resumes, have them check the color of their star and put one color at one table, and one color at another.
  • Puzzle Pieces – purchase small puzzles with 4-6 pieces and distribute them to the class.  When it is time to regroup, have them group with people who can complete their puzzle.  Add a little competition by having the group that forms their puzzle first yell “you complete me” and then provide them a small prize.
  • Have you ever had to train where everyone is in rows and there are no tables.  Have the odd number rows turn around to the people behind them to form small groups.

So what are some cool techniques that you have used to form groups.  Mail them to me at poortrainer@gmail.com or post them in the comments below.


Posted in Training | Tagged , , , , , | Leave a comment

The Trainer’s Toolbox

Trainer's Tool BoxMuch is said about adding tools to your “toolbox.” Trainers are often adding skill sets and learning different methods to train participants.  However, I have another tool box, a real one, which I use to keep those essential items I will need when I am training. My toolbox is a plastic box the size of a shoe box that holds the following:

  1. A deck of cards – In some cases I encourage participants to speak up by
    awarding cards throughout the training. At the end of the training we play
    poker with the cards and the highest poker hand gets a small prize. Warning:
    In highly competitive groups this can become distracting as the participants
    are more focused on getting cards than the content of the course.
  2. A tide stick – Regardless of how careful I am at breakfast, I will often show up
    to class wearing eggs or jelly. Always have a tide stick for those times a quick
    clean-up is needed and a laundry mat is not a reasonable option.
  3. Lip Balm – It seems that 30 seconds before I start speaking my lips dry up as if
    I had been wandering in the Sahara for a week.  I have some mints for the same reason.
  4. Dry Erase Markers and Permanent Flip Chart Markers – Change them yearly or
    as needed to keep them fresh.
  5. Stickers – Use colored stars to reward participation in class. The person with
    the most stickers at the end of the training gets the prize. You can also place
    different colored stickers on name tents while participants are at lunch and
    then regroup them based on the color of the stickers when they return.
  6. Sticky Notes – Have sticky notes on the tables for participants to write down
    questions and then post them on a parking lot during breaks. They can also be
    used to conduct an impromptu Jeopardy game.
  7. Musical Instrument – Train whistle or other instrument used to bring the class
    back together from break or activities.
  8. Masking or Painter’s Tape or putty – Used to hang flip charts. Blue painter’s
    tape seems to work best in general.
  9. Small index cards – can be used to provide instruction for activities, for quick “pop-up” review exercises or to place questions on the classroom parking lot.

While none of these resources are free you should consider ways of obtaining them inexpensively.  Flip chart markers, whiteboard markers, sticky notes and index cards can often be obtained through your organization’s office supply resource.  Masking tape,  cards, and musical instruments can often be obtained inexpensively at a dollar store.  For me, this is the most expensive resource I have had to purchase.  However, I can’t tell you how many times I have used these resources when faced with challenges in the classroom.

Next week…Organizing table settings so they are quick and easy to set up.  See you soon.

Posted in Training, Uncategorized | Tagged , , , | Leave a comment

Coloring and the Tactile Learner

crayons2 Many adults love to color. One thing I have found over the years is that by laying out a few coloring pages and some crayons many adults will keep their hands busy, and their mind active, when someone is providing extensive information by lecture. No, I do not lecture for extended periods of time. I do, however, invite in speakers who may have a tendency to drone on about things participants might not be so interested in (remember, I work for the government). In addition, even of they are interested in the topic being presented, having colors and coloring pages available can help with students who learn in a tactile fashion. Studies seem to indicate that having something to engage a tactile learner’s hands helps to engage a tactile learner’s mind.

OK, so how can I do this within a low-budget? The key is planning ahead. At the beginning of the school year keep an eye open for markers and crayons going on sale. If you watch closely you can purchase 16 count crayons for 50 cents a package and sometimes for as little as 25 cents. Purchase 20 boxes for ten bucks and you are probably set for a year, if not longer. Coloring pages appropriate for adults can be found for little to no cost around the web. coloringprintables.net  has a wide variety of coloring pages which can be downloaded in a .pdf format for FREE. For an example of one, select this Abstract page. If you want a wide variety of digital pages to choose from you may also purchase a book of 50 coloring pages online at www.art-is-fun.com for $10.00 U.S.  The author provides written consent to print out two pages per participant for educational purposes.

By far, the best resource I have found is Doodle Art Alley, a website dedicated to providing a wide variety of coloring pages at no cost (that’s FREE).  Hundreds of coloring pages are categorized so they can easily be located.  Christmas just around the corner, they have Christmas coloring pages.  Looking for a cool mandala for a cultural diversity class, they have over ten.  It’s a great site and did I mention they are free.  Unfortunately, they are restricted by some agency’s browser security restrictions.  Therefore, I will have a few posted on a rotating basis in the resource section of this website.  A special Shout-Out to Lesley Williams for sending me this resource.

Have any additional resources for coloring pages.  That’s right, you need to e-mail me at poortrainer@gmail.com

Posted in Training | Tagged , , , , | Leave a comment